
3D scanning for beginners: key concepts, technologies and how to choose a scanner
Accuracy, precision and resolution, the main 3D scanning technologies, six questions before buying a scanner, and a hands-on Einstar 2 demo: scanning, alignment and caliper checks.

- 88 articles
- 00 likes
- 8282 views
Kỹ sư trẻ, kẻ mộng mơ, người làm trần thông biển
Tired of measuring with calipers over and over, then spending hours clicking away in CAD, only to find the printed part doesn't fit? And when the surface is curved like a shrimp or soft like a noodle, how do you even measure it?
3D scanning can copy almost any real-world object into a 3D model, quickly and fairly accurately. But once you start digging in, you hit a wall of jargon: laser, LiDAR, photogrammetry, Gaussian splatting, point cloud, mesh, alignment, reverse engineering, and precision that isn't the same as accuracy… This article is the beginner's map I put together: the core concepts, scanning technologies, how to choose a scanner, the gear you need and how a scan actually gets made.
Disclosure: This video is sponsored by StarElite, the official Shining 3D distributor in Vietnam. I received an Einstar 2 free of charge to learn and practice with. No one had any input on the content. In this video I focus on the fundamentals and use the Einstar 2 for demos; it isn't a detailed review of the scanner. The Einstar 2 costs VND 32 million (excluding VAT); use code TECHNIXSCAN10 for 10% off.
1. What is 3D scanning?
Everyone has scanned a document: put the paper in, get an image or PDF out. That's 2D scanning.
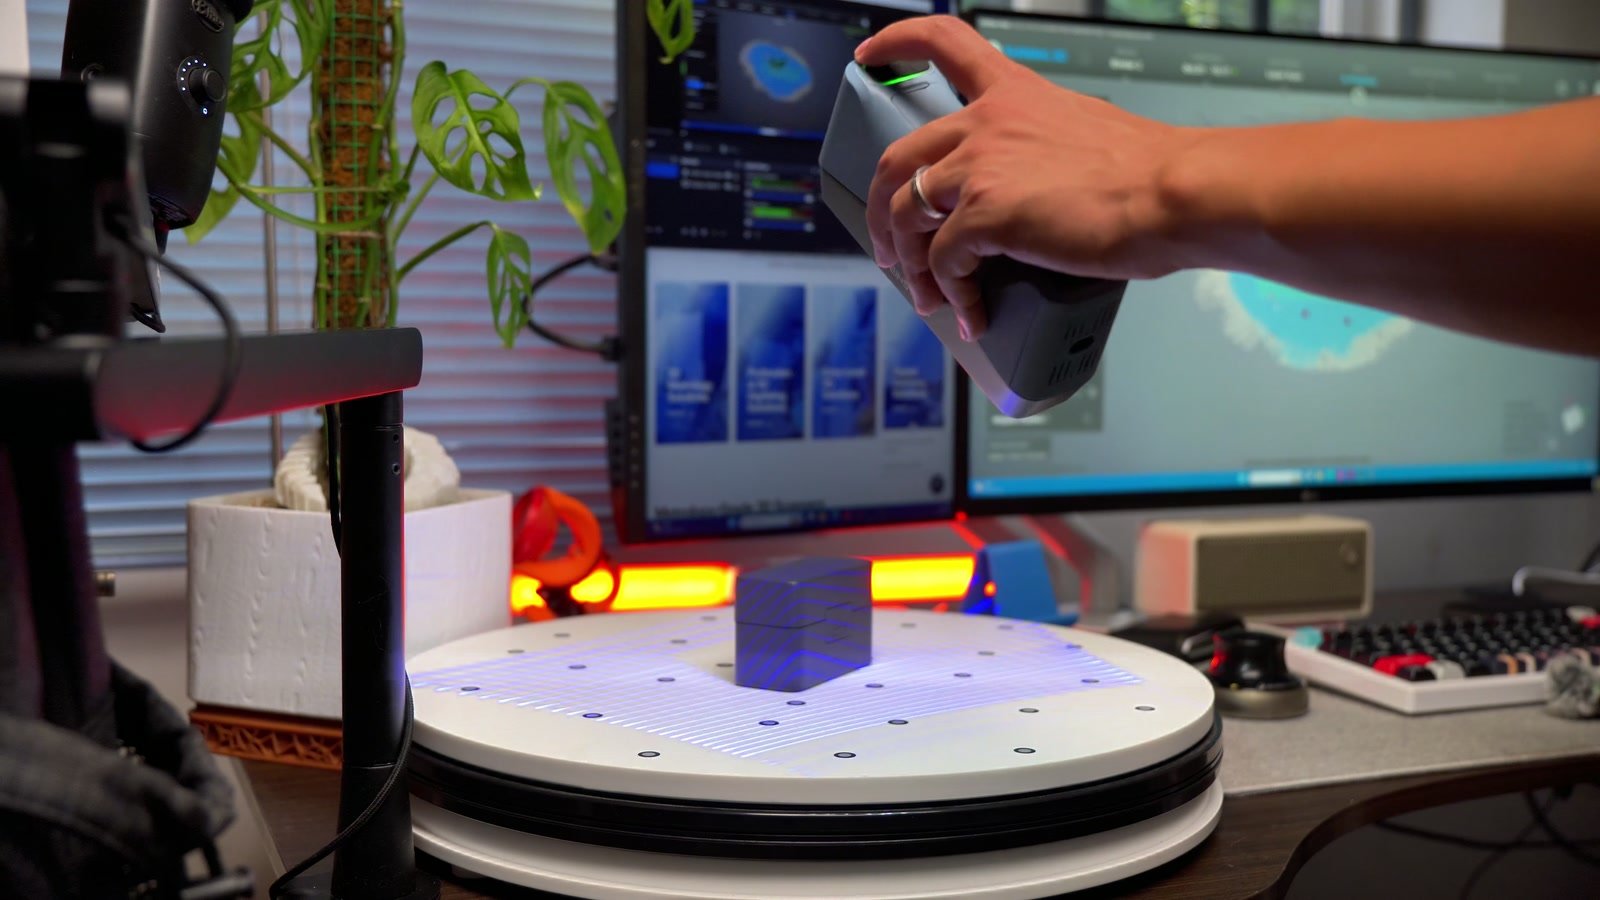
3D printing turns a digital model into a physical object. 3D scanning goes the other way: it turns the object in front of you into a 3D model on your computer.
- The scanner measures the distance to millions of points on the object's surface, forming a point cloud.
- Software connects those points into a network of tiny triangles called a mesh — the STL format every 3D printing fan knows.
- If the scanner has a color camera, it also captures the object's color and texture.
2. Three concepts people mix up most
Accuracy
How far the scan deviates from the real dimensions. For example, an object is 200 mm wide, but the scan measures 200.05 mm.
Scanner specs also list volumetric accuracy, written like 0.04 + 0.06 mm/m. It means error accumulates with size: scanning a small camera gives a small deviation, but the same scanner on a 2 m statue can be off by a few millimeters. Accuracy can also vary by direction and by part within a single scan.
Precision (repeatability)
Often mistranslated as "accuracy", but in technical documents this is precision or repeatability: if you scan the same object several times, in the same conditions, with the same device, how similar are the results?
Picture four archers, five arrows each:
| Archer | Result | What it means for a scanner |
|---|---|---|
| First | tight group, right on the bullseye | accurate and precise — the goal of every scanner |
| Second | tight group, but shifted to one side | precise but not accurate, like an uncalibrated scanner: wrong the same way every time |
| Third | scattered, but the average is near the center | OK on average but not precise — different every time |
| Fourth | scattered and off-center | time to give up |
One bullseye proves nothing — it might be luck. You need enough measurements to draw a conclusion.
Resolution (point distance)
The smallest distance between two points the scanner captures, i.e. how fine a detail it can pick up: textures, ribs, holes, engraved text. It's different from the smallest object the scanner can scan.
A scan can look super smooth, showing every fold of a shirt, and still be off by a few millimeters overall if the scanner isn't well calibrated or the object is large. Pretty isn't necessarily correct. Some people need pretty, some need correct.
3. The "schools" of 3D scanning
There are two basic groups: contact and non-contact.
Contact: coordinate measuring machines (CMM)
A CMM touches the surface with a probe to record XYZ coordinates point by point, then compares them with the tolerances on the drawing. Some reach 0.5 µm accuracy and don't care about color or shine. The downside: it's slow, one point per touch, and soft materials like TPU, silicone or rubber can deform under the probe. So CMMs are mostly used to check critical mechanical dimensions.
Non-contact
These use only light, cameras or lasers. Four common groups:
- Photogrammetry: take dozens to hundreds of photos around an object with a phone or camera, then feed them into Polycam, KIRI Engine or Meshroom to rebuild the model. Almost free, but results depend heavily on lighting, surface and shooting skill. Good for printing a scaled-down statue when accuracy doesn't matter much. Gaussian splatting (published in 2023) recreates whole spaces very realistically but doesn't produce a closed surface you can print or measure — it's better suited to games and film.
- LiDAR on iPhone and iPad Pro: fires a laser and measures the time for light to return. Great for scanning rooms quickly, with errors from a few millimeters to centimeters. Useful for interiors and architecture, not for small mechanical parts.
- Laser scanning: three types. Laser triangulation projects laser lines onto the object while an offset camera calculates depth; very detailed at close range, and the blue laser mode on handheld scanners belongs here. Time of Flight measures how long a laser pulse takes to return, with a range of hundreds of meters, used for terrain and construction. Phase-shift has a shorter range but is faster and denser, often used for factories and piping. The last two are tripod-mounted terrestrial scanners most beginners won't touch.
- Structured light: projects a grid, stripe or dot pattern onto the object and reads how it deforms to calculate the shape. Fast, good for mid-size objects up to a person; dental intraoral scanners use it too. On Shining 3D scanners, the infrared structured light mode is called IR Rapid: the light is invisible and eye-safe when scanning people.
4. Six questions before buying a scanner
- What will you scan it for? Mechanical fit, snug accessories or inspection: look at accuracy and precision. Statues, crafts or game assets: resolution and a color camera matter most.
- Big or small objects? Check the smallest scannable object size, working distance and field of view. A scanner that nails a screw may not cope with a car door.
- What material? Black, shiny or metal objects are handled better by blue laser. People and pets need infrared or eye-safe light, and fast scanning. Transparent objects need matte spray on any scanner.
- Handheld or desktop? Handheld scanners are flexible and portable. Desktop scanners with automatic turntables suit small objects and batches of similar items. For 3D printing, I think a handheld is more versatile.
- Read the specs correctly. 0.05 mm resolution does not mean 0.05 mm accuracy. For volumetric accuracy, look at the per-meter part too. If a brand doesn't publish accuracy, ask to scan your own object and measure it yourself. If you plan to offer inspection services to factories, you need a scanner certified to a standard such as VDI/VDE 2634.
- Budget for everything. Besides the scanner: a powerful enough computer (sometimes as expensive as the scanner), markers, spray, a turntable, reverse engineering software, and after-sales support: local warranty, technical help and recalibration.
| Need | Suitable technology | Rough cost |
|---|---|---|
| Just trying it, simple decorative items | Photogrammetry on a phone | almost free |
| Measuring rooms, as-built interiors | LiDAR on iPhone or iPad Pro | the cost of the device |
| 3D printing parts, accessories, basic reverse engineering | Handheld blue laser + infrared scanner | about VND 20–50 million |
| People, statues, furniture | Structured light or infrared with a color camera | about VND 20–50 million |
| Metrology, inspection, factory services | Certified metrology-grade laser scanner or CMM | hundreds of millions and up |
| Buildings, terrain, large facilities | Terrestrial ToF or phase-shift laser scanner | hundreds of millions to billions |
In short: a scanner around VND 20–50 million covers most 3D printing work. Metrology and inspection need a much bigger investment. As for scanners under VND 20 million, I don't have much confidence in them yet.
5. Einstar 2: the scanner I used for the demos
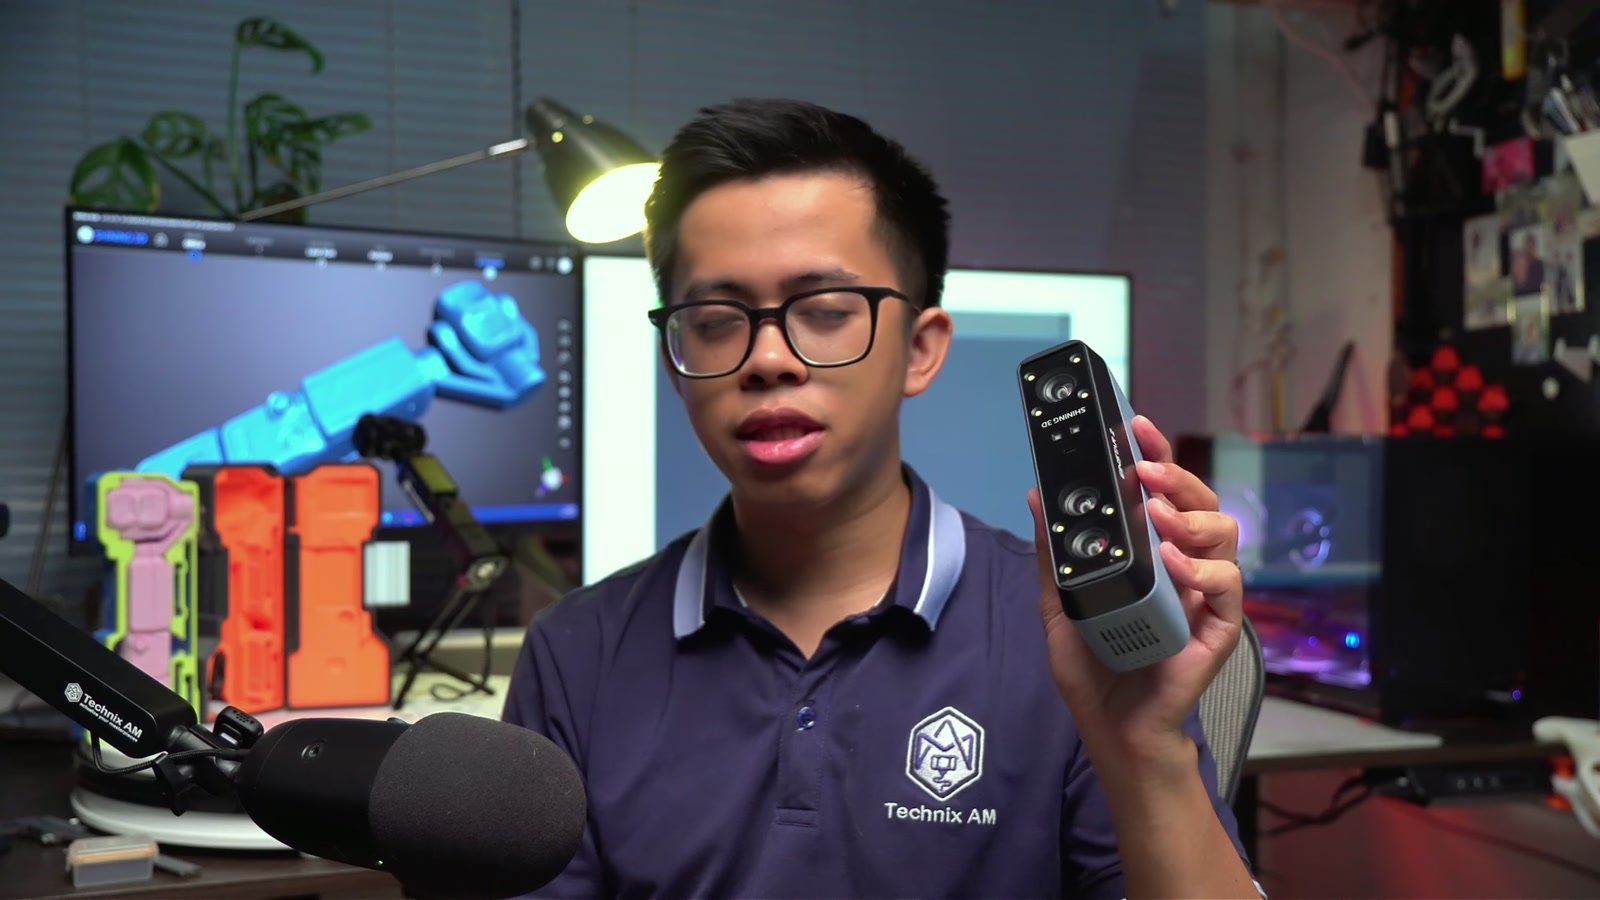
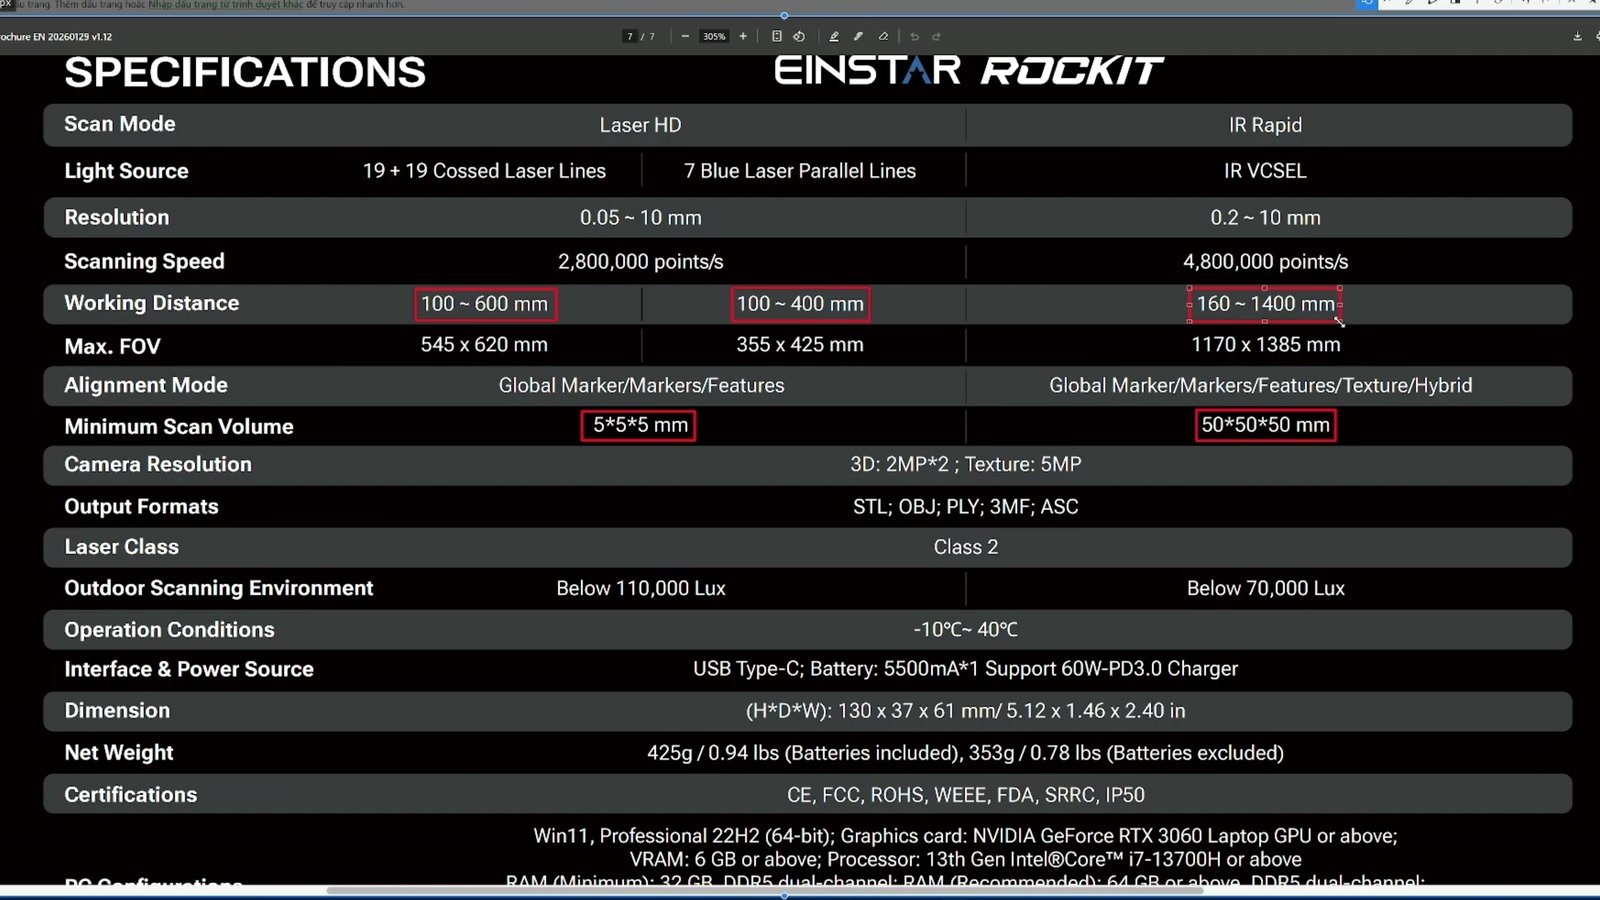
Shining 3D's Einstar 2 is a "prosumer" scanner: compact and easy for individuals, with performance close to professional gear. Against the six questions above, it's a handheld with both blue laser and infrared, priced within reach of 3D printing users.
| Item | Laser HD | IR Rapid |
|---|---|---|
| Technology | 17 parallel blue laser lines, triangulation | VCSEL infrared, structured light |
| Best for | objects down to about 1 cm, mechanical parts, metal, shiny items | objects from about 5 cm, furniture, people |
| Resolution | from 0.05 mm | — |
| Speed | up to 2.5 million points/s | up to 4.8 million points/s |
| Alignment | markers | geometry, texture, hybrid or markers |
| Scanning distance | — | up to 1.4 m |
- Weighs 420 g with the battery, works wirelessly, with up to 3 hours of battery life according to the brand.
- Works outdoors in sunlight and exports STL, OBJ, PLY and 3MF.
- To be upfront: on the spec page I couldn't find a published accuracy figure for the Einstar 2. That's why I measured it myself in the demo.
6. Preparation: unboxing, computer and tools
In the case: the scanner, a calibration board with stand, a charging dock, a 5,500 mAh battery, a long USB-C cable for calibration and two packs of 3 mm and 6 mm markers. Look after the calibration board — dropping it is painful. First thing: fully charge the battery.
Safety: Laser HD is a low-power Class 2 laser; the blink reflex usually protects you from a brief glance, but never stare into the laser window. If you're filming, don't point the laser straight into a camera lens, as it can damage the sensor.
Computer: the brand recommends Windows 11, an RTX 3060 Laptop GPU or better, at least 32 GB of RAM (64 GB recommended) and a 13th-gen i7 or newer; on Mac, at least a MacBook Pro M1 with 16 GB RAM. In practice, more is better: on a ThinkPad with an 11th-gen i9, RTX 3080 Laptop and 64 GB RAM, scanning was still quite laggy; on a PC with a 13th-gen i7, RTX 5080 and 32 GB RAM it was smooth. For a laptop, I'd pick a dedicated RTX 4060 or better. The software is EXStar Hub (it must say Hub to work with the Einstar 2).
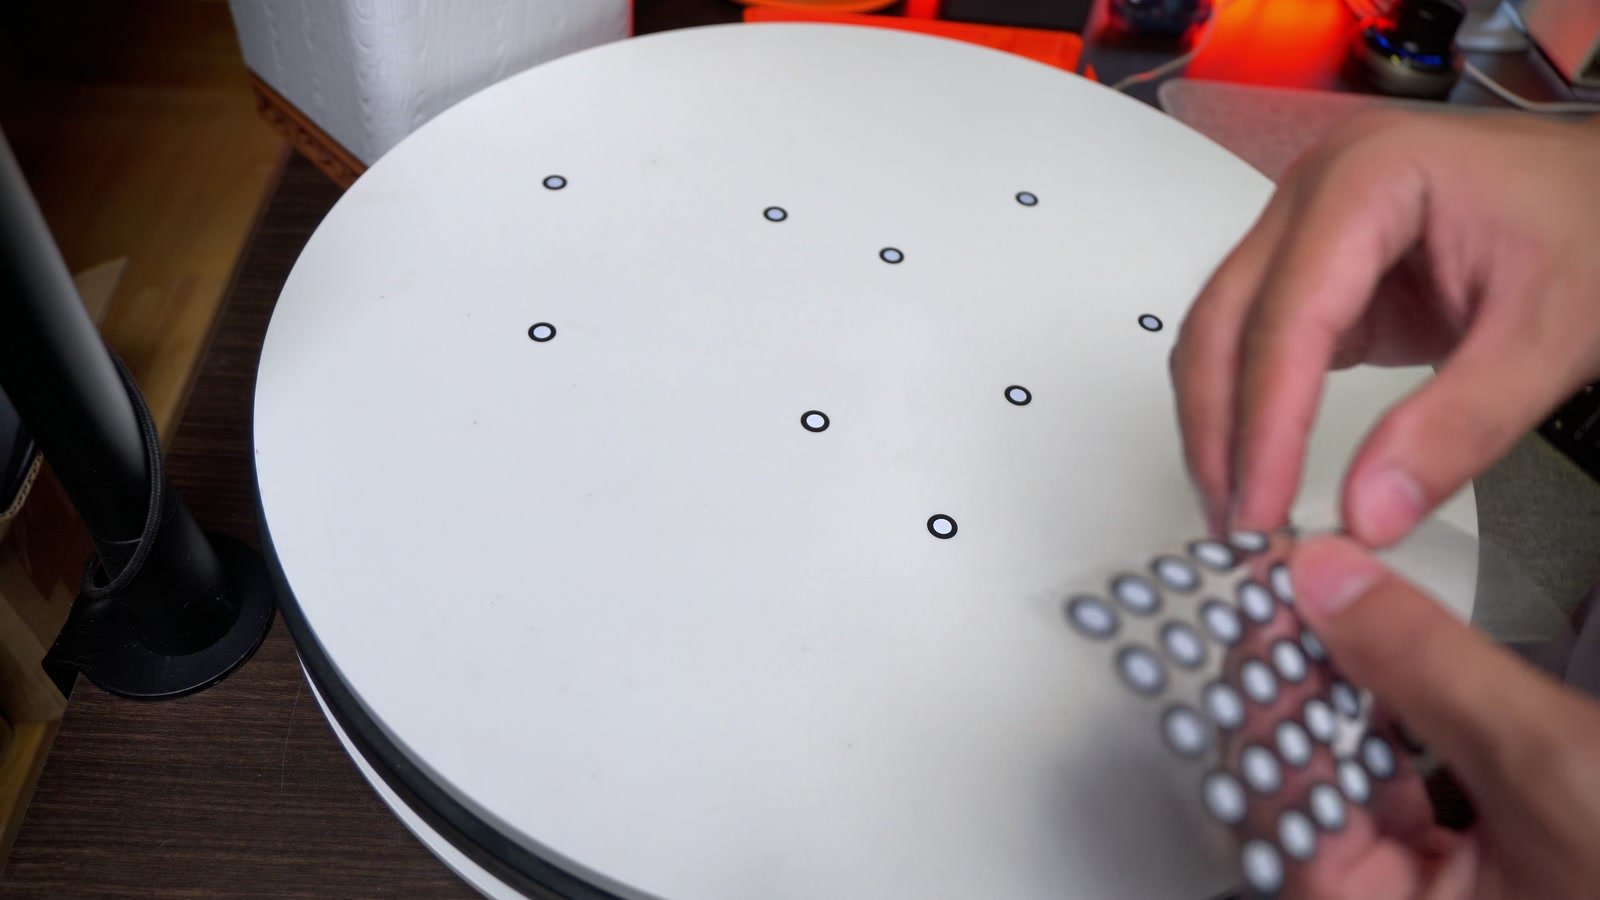
Markers and turntable: Laser HD scanning needs markers. I stick markers on a turntable, scan one item, then put the next one on. Fix wobbly objects with double-sided tape or hot glue and turn the table gently — if the object shifts relative to the markers, the scan gets ghosting.
Matte spray: for very shiny items, spraying is still faster and more accurate; transparent items must be sprayed. Spray in a ventilated area, away from flames, and don't inhale it.
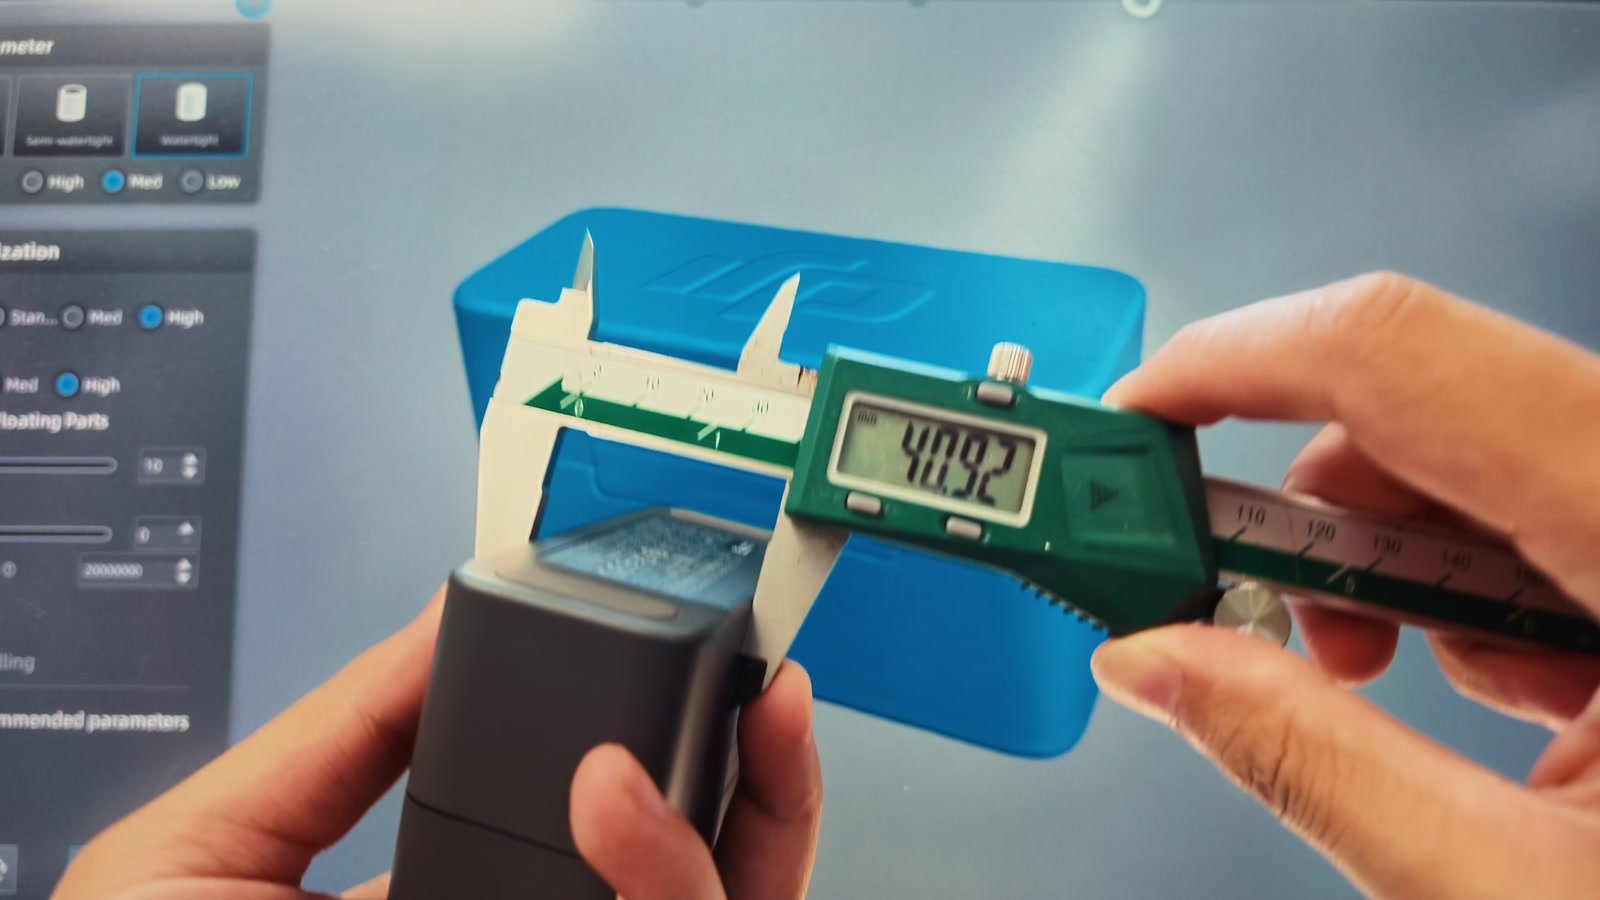
Calipers: to check results, measure a few spots on the real object and again on the file. Get a reliable digital caliper; mine is an Insize, about VND 600,000 on sale.
7. Connecting and calibrating
Insert the battery and hold the middle button for about 5 seconds to power on. A green bottom light means power, yellow means low battery; a blinking blue top light means it isn't connected to the computer yet.
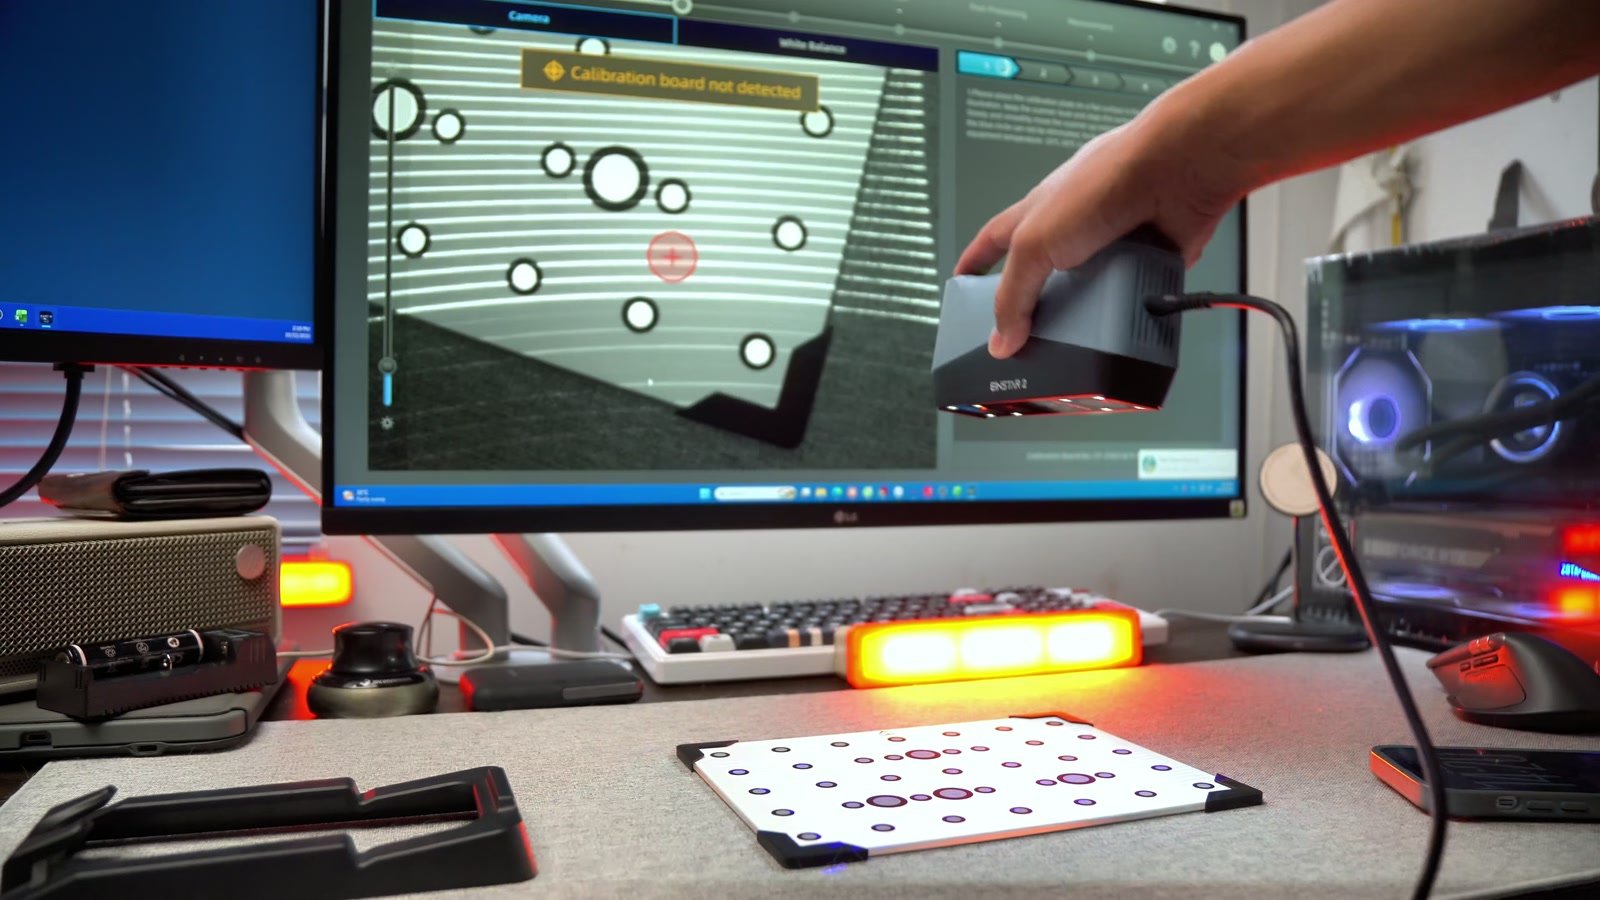
Calibration is mandatory on first use, and the software will remind you periodically after that. My rule: if in doubt, recalibrate. Remember the second archer? An uncalibrated scanner is exactly that — precise but off.
The Einstar 2 must be cabled for calibration. Open EXStar Hub, set up the calibration board and follow the on-screen instructions, changing angles and holding positions as shown. My first time took almost 30 minutes; matching the illustrations carefully makes it much faster.
8. Alignment: stitching the data together
Alignment is where beginners stumble most. The scanner doesn't capture the whole object at once; it captures small pieces continuously and has to know where each new piece sits relative to the last. There are two levels.
Level 1: alignment while scanning
You pick this when creating a project, and each scan mode has its own options:
- Laser HD: Markers Alignment (markers on or around the object, used for positioning) is the usual choice. Global Markers first scans all the markers to build a coordinate frame, then scans the surface; it's for large objects with few geometric features that need high accuracy, since errors don't accumulate piece by piece. Supported marker sizes are 3, 6 and 12 mm.
- IR Rapid: for people, align by geometry (feature), by texture, or both. For objects, there's Hybrid (geometry, markers and texture combined) or Global Markers. Hybrid only needs markers on flat, featureless areas. Texture alignment lowers the frame rate, so only turn it on when needed.
Two small traps from the documentation: below 30% battery the marker modes can't be used; and in IR mode, the resolution chosen when creating the project group is fixed and can't be changed later.
Marker tips: place them randomly and sparsely, not in straight lines or regular clusters, or the software may confuse them. Each frame should see at least a few markers. For smooth objects you don't want to stick markers on, place a few irregularly shaped items around them, or draw some lines with an erasable pen and align by texture.
Level 2: aligning projects together
Every object has a hidden side, like the bottom resting on the table. So I scan the top in one project, flip it and scan the bottom in another, then align them (generate the point cloud for each project first). EXStar Hub has three methods:
- Auto Feature Alignment: the software finds matching geometry and aligns automatically. Fastest, good for objects with lots of edges.
- Manual Feature Alignment: if auto fails, do it by hand. Hold Shift, pick at least 3 common, non-collinear points on each project, then click Apply.
- By Manual Markers: same idea but pick at least 3 common markers; round markers are easier to hit precisely.
The three hand-picked points only place the projects roughly; the software then refines the fit using the overlap. So when scanning two sides, leave a wide enough overlap with clear geometry. Round, symmetric objects or ones with repeated details are easy to misalign, so use markers or manual alignment.
9. Demo: scanning a DJI Mic mini case and checking dimensions
I used Laser scan, marker alignment on a turntable and 0.2 mm resolution (plenty for this case). Scan the top, delete the excess and the turntable surface, generate the point cloud; create a new project, flip the case and scan the bottom; then use Auto Feature Alignment. With its clear edges and corners, it aligned on the first try. Finally click Mesh Model: Watertight fills holes automatically, Unwatertight keeps the surface open for you to fix later.
One small minus of the software: I couldn't find the close button on the guide panel that pops up at first. Tick Do not prompt again and close it. Also, EXStar Hub only saves to a local folder, not directly to the cloud.
Checking against calipers
I measured the same dimension of the case with an Insize 0–150 mm caliper (0.02 mm resolution) and on the scan file:
| Measurement | 1 | 2 | 3 | 4 | 5 | 6 |
|---|---|---|---|---|---|---|
| Caliper (mm) | 40.92 | 40.91 | 40.84 | 40.87 | 40.93 | — |
| Scan file (mm) | 40.7661 | 40.7738 | 40.8372 | 40.8775 | 40.9484 | 40.9101 |
- Caliper average: 40.89 mm. Scan average: 40.85 mm. A difference of only about 0.04 mm, roughly twice the caliper's own resolution. That's trueness.
- But the six scan measurements spread over about 0.18 mm, twice the spread of the caliper readings (0.09 mm). So precision isn't that high yet.
- Note: I measured at different positions, the case itself has manufacturing tolerances, its two faces may not be perfectly parallel, and where I picked points on the mesh (near the edge or in the middle) also changes the result.
For cases or 3D printed accessories, this level of deviation is perfectly usable, since FDM printers have around 0.1 mm error too. A serious scanner evaluation needs a reference artifact, matching positions and a proper procedure — I'll save that for a detailed review.
Two harder demos
- Cat massager: curved surfaces and parts that wobble, so it needs to be fixed in place and the turntable turned gently.
- DJI Osmo Pocket camera: black, partly shiny and partly matte. I covered the lens and screen with masking tape and scanned 5 projects for 5 angles, then aligned them. With many similar rounded surfaces, auto alignment can slip; picking common markers for manual alignment is more reliable.
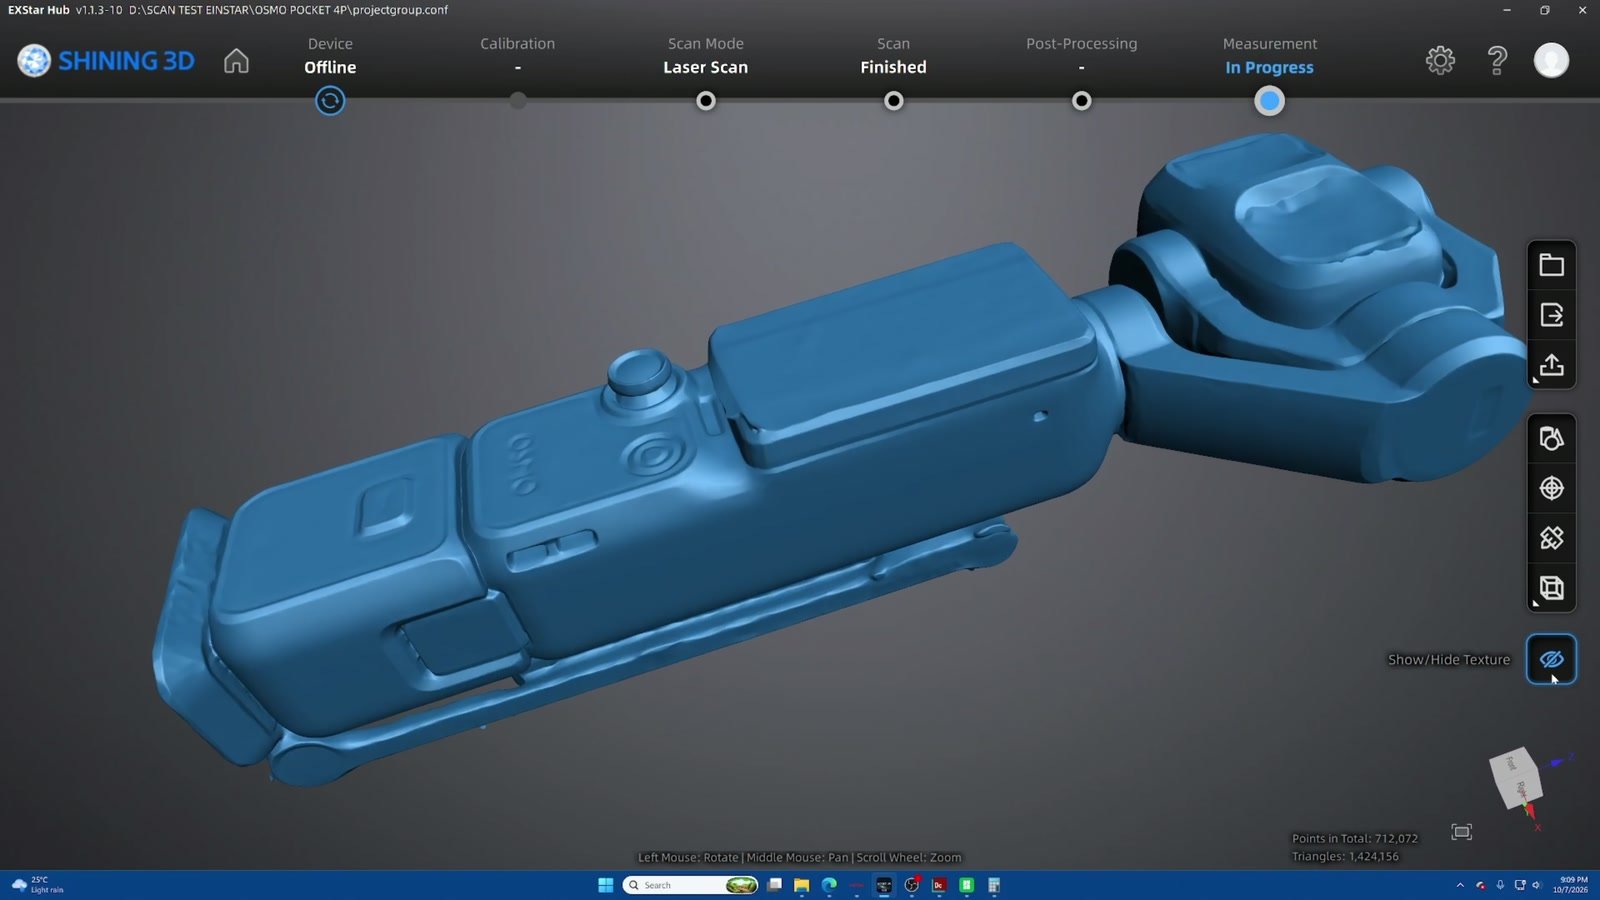
You don't always need every angle. Sometimes one side is enough as a reference for design. Scan all angles when you're reverse engineering or making an accessory that wraps the whole product.
10. You have a scan — now what?
- Print it directly: statues, toys, reference models, decorations. Choose Watertight at the Mesh Model step, export STL or 3MF, load it into your slicer, split it to reduce supports and print.
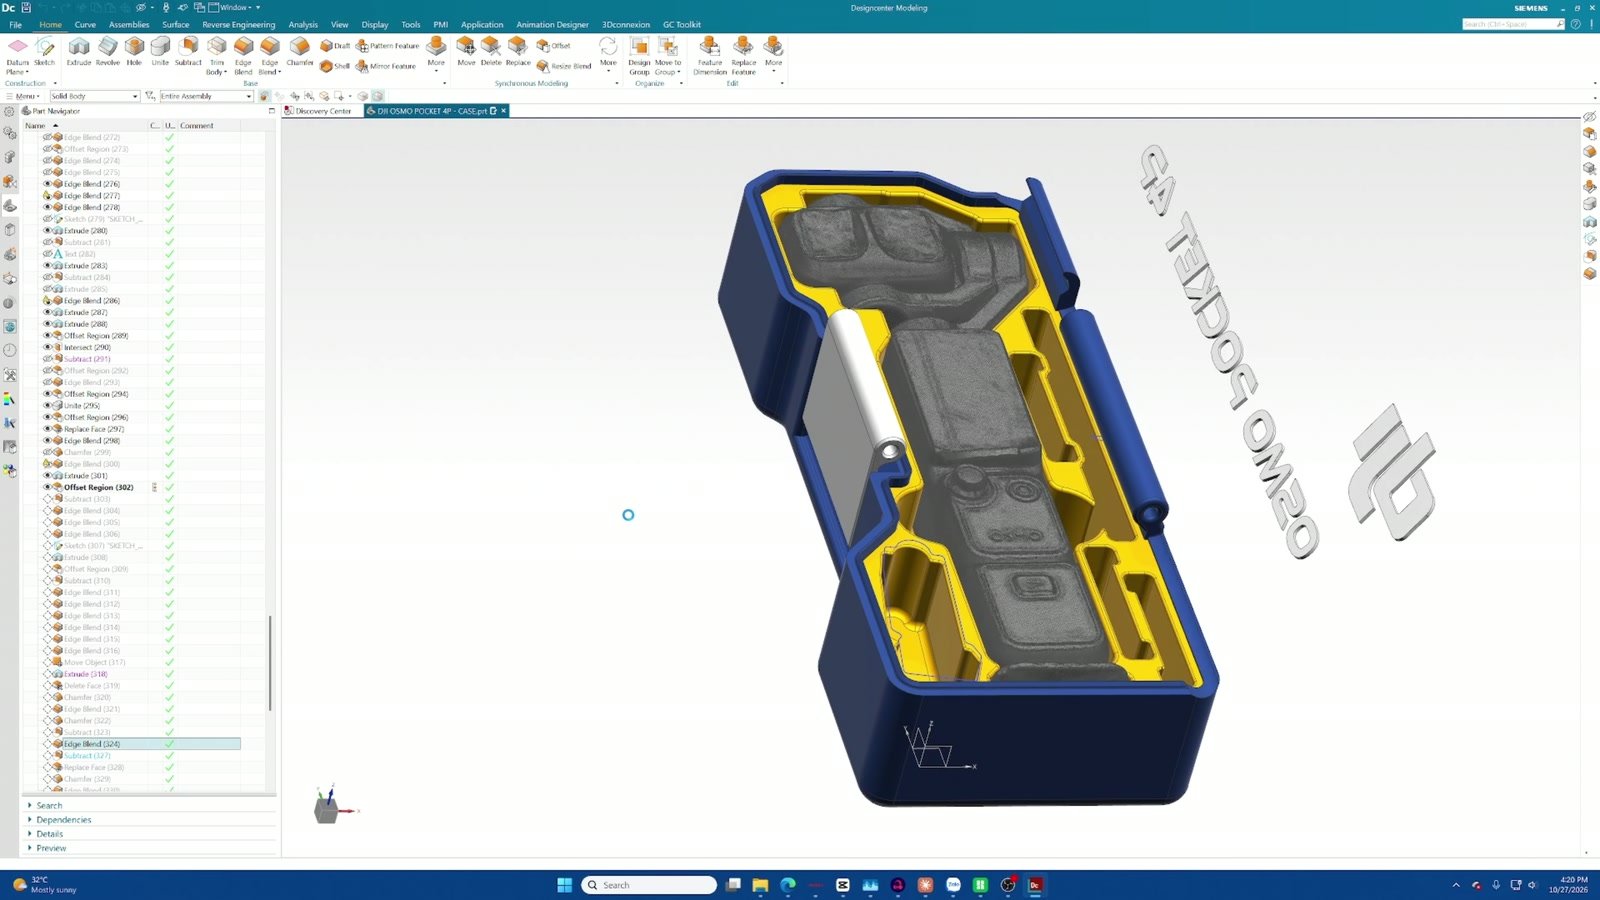
- Use the mesh as a "virtual template": design accessories, protective cases or grips that follow the object's shape. For example, I brought the camera scan into my CAD software to design a snug case, then printed it.
- True reverse engineering: convert the triangle mesh into a CAD file with mathematical surfaces, proper dimensions, radii and parameters. Knowing how to model isn't enough; you need to analyze and rebuild the geometry following the mesh.
A mesh is just a map to trace over — not an editable CAD file.
Final thoughts
3D scanning sounds simple — wave the scanner around and you're done. But a scan that's clean, accurate and usable takes practice, observation and experience. It's not that complicated either: today's scanners are much easier to use and far more affordable than 2–3 years ago, while the quality is still reliable.
I'm only taking my first steps too. If you have years of 3D scanning experience, please leave your feedback under the video and help me correct anything I got wrong. And if you're new as well, I hope this map makes getting started a little less confusing.
References: Einstar 2 specifications and product page on the official Einstar website; Shining 3D EXStar Hub documentation (Project Group Settings, Scan Settings, Project Alignment); Einstar forum.
How did you find this article?
1 people reacted · Sign in with Google to react